This is an old article I wrote way back in 2003 but never published. It details the process of creating a custom 1/43 scale slot car out of a plastic model kit.
(Click on any image to enlarge it for more detail).
Introduction

Although this particular car was built for the 2003-2004 Artin car competition, the story starts back in the early eighties…
…for as long as I can remember, my favorite car of all time has been the ’69 Mach 1 Mustang. I’ve actually owned two of them, and it is a classic muscle car. Back when I had them, I was always on the prowl for plastic model kits or die-cast replicas, but nobody was producing any. Finally, I found one, but it was a snap kit in 1/43 scale! Not exactly what I was looking for, but I bought a few of them and hung on to them over the years.
Fast forward to 2003. Now I’m getting into 1/43 scale slot cars. I’ve built a modest collection from current day sets and a few eBay purchases. While surfing the web one day, I happen to come across a notice for the Artin car competition. Hmm, I’ve got quite a few old chassis to work with. I also have some extra new cars with the newer (and faster) drive trains. Finally, I still have my old plastic model kits. What a great excuse to have some fun!
Components
Here are the basic components that went into building this car….
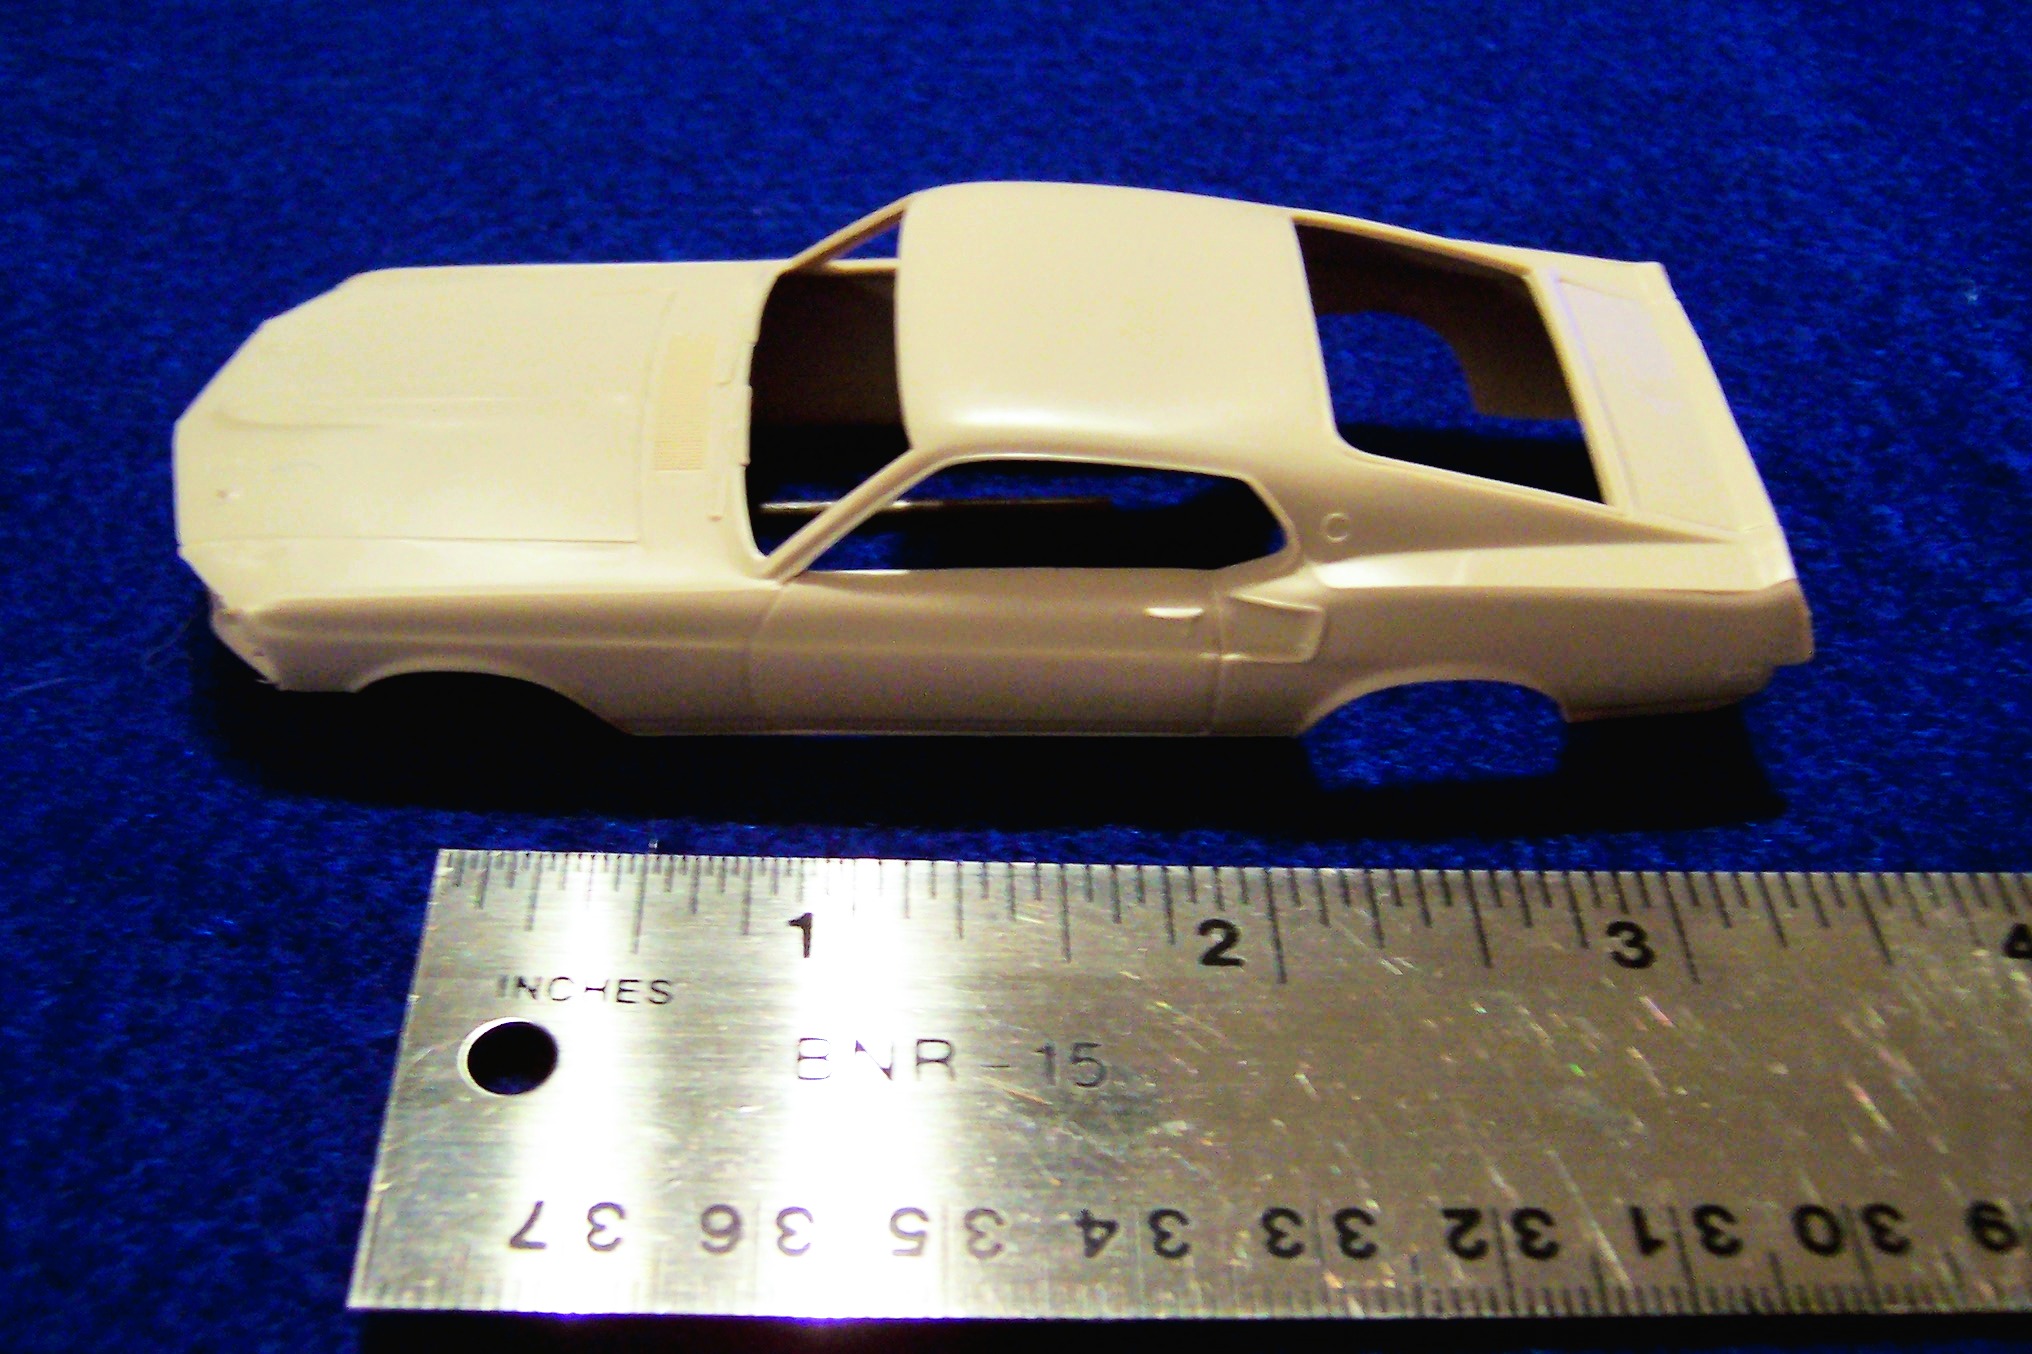
(1) AMT Plastic Model Kit
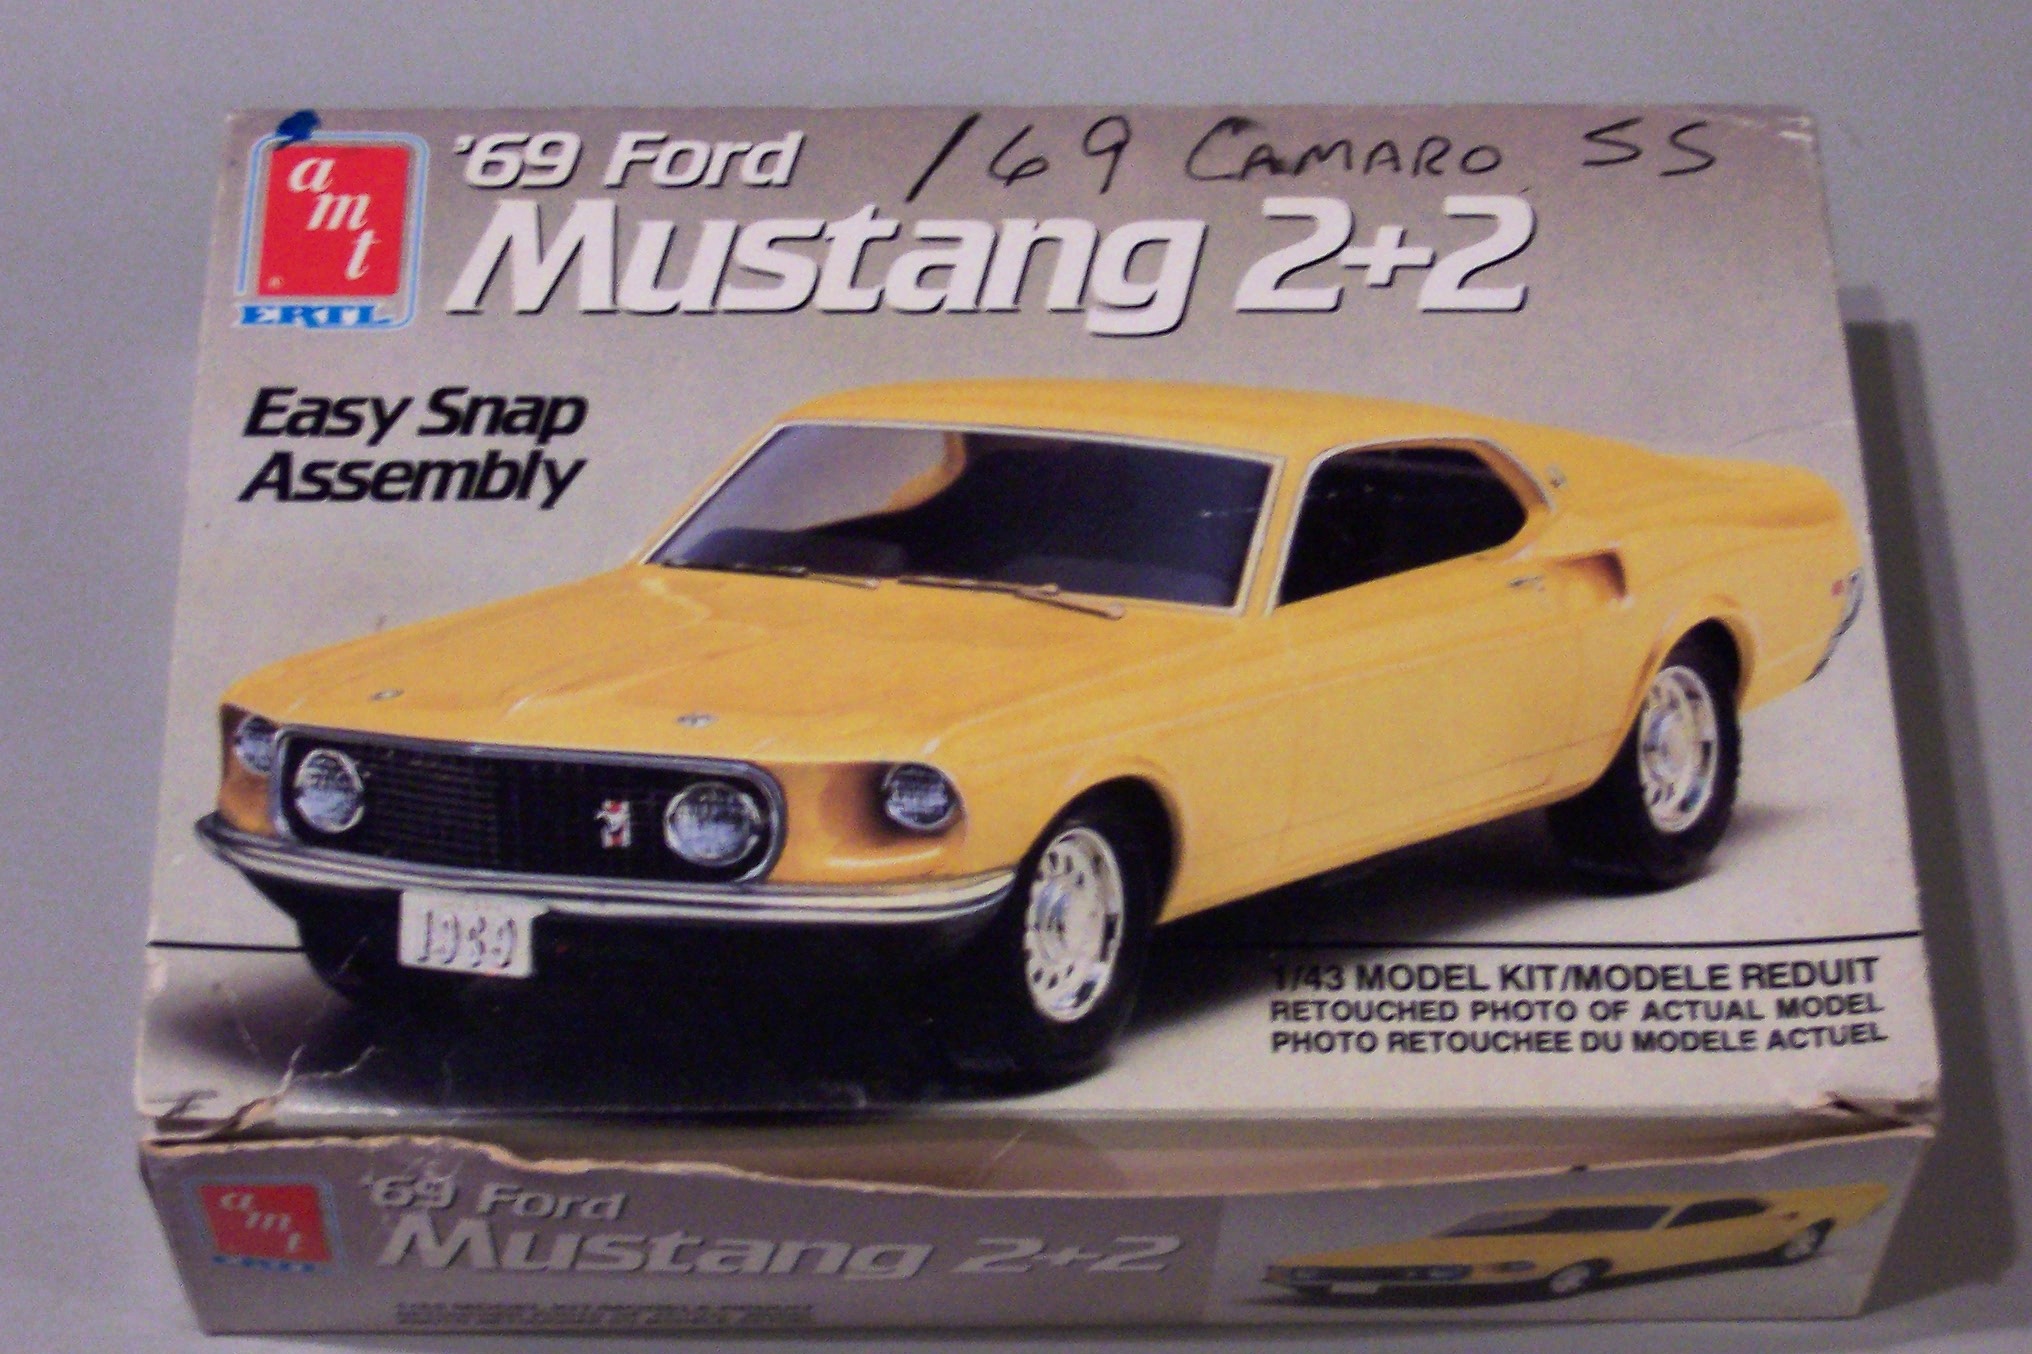
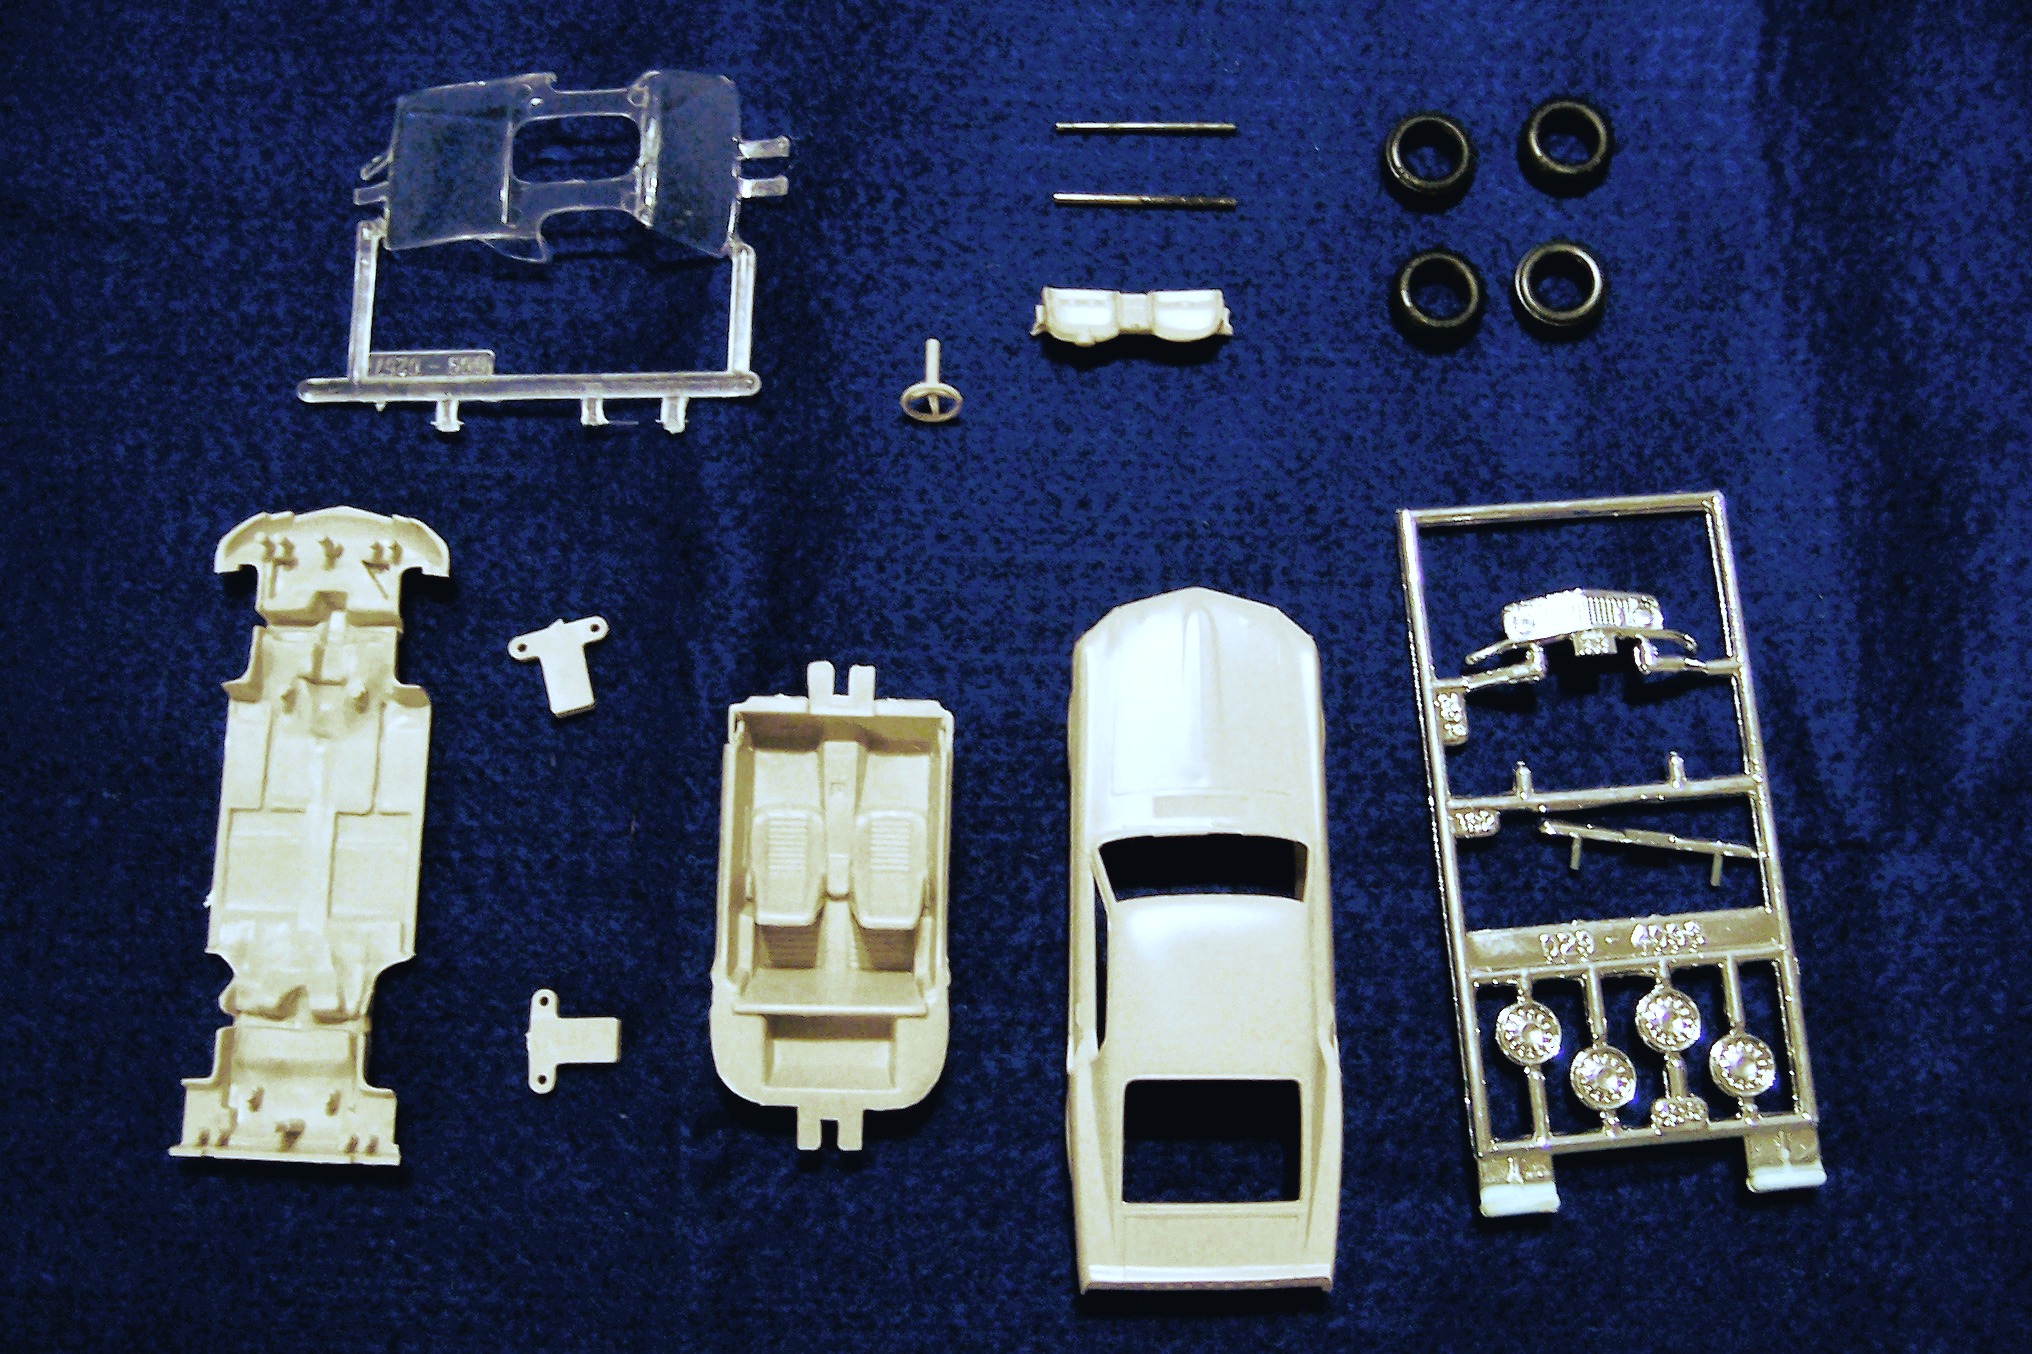
I used only one of my three full kits, but I did use a spare passenger compartment for testing my Dremel work.
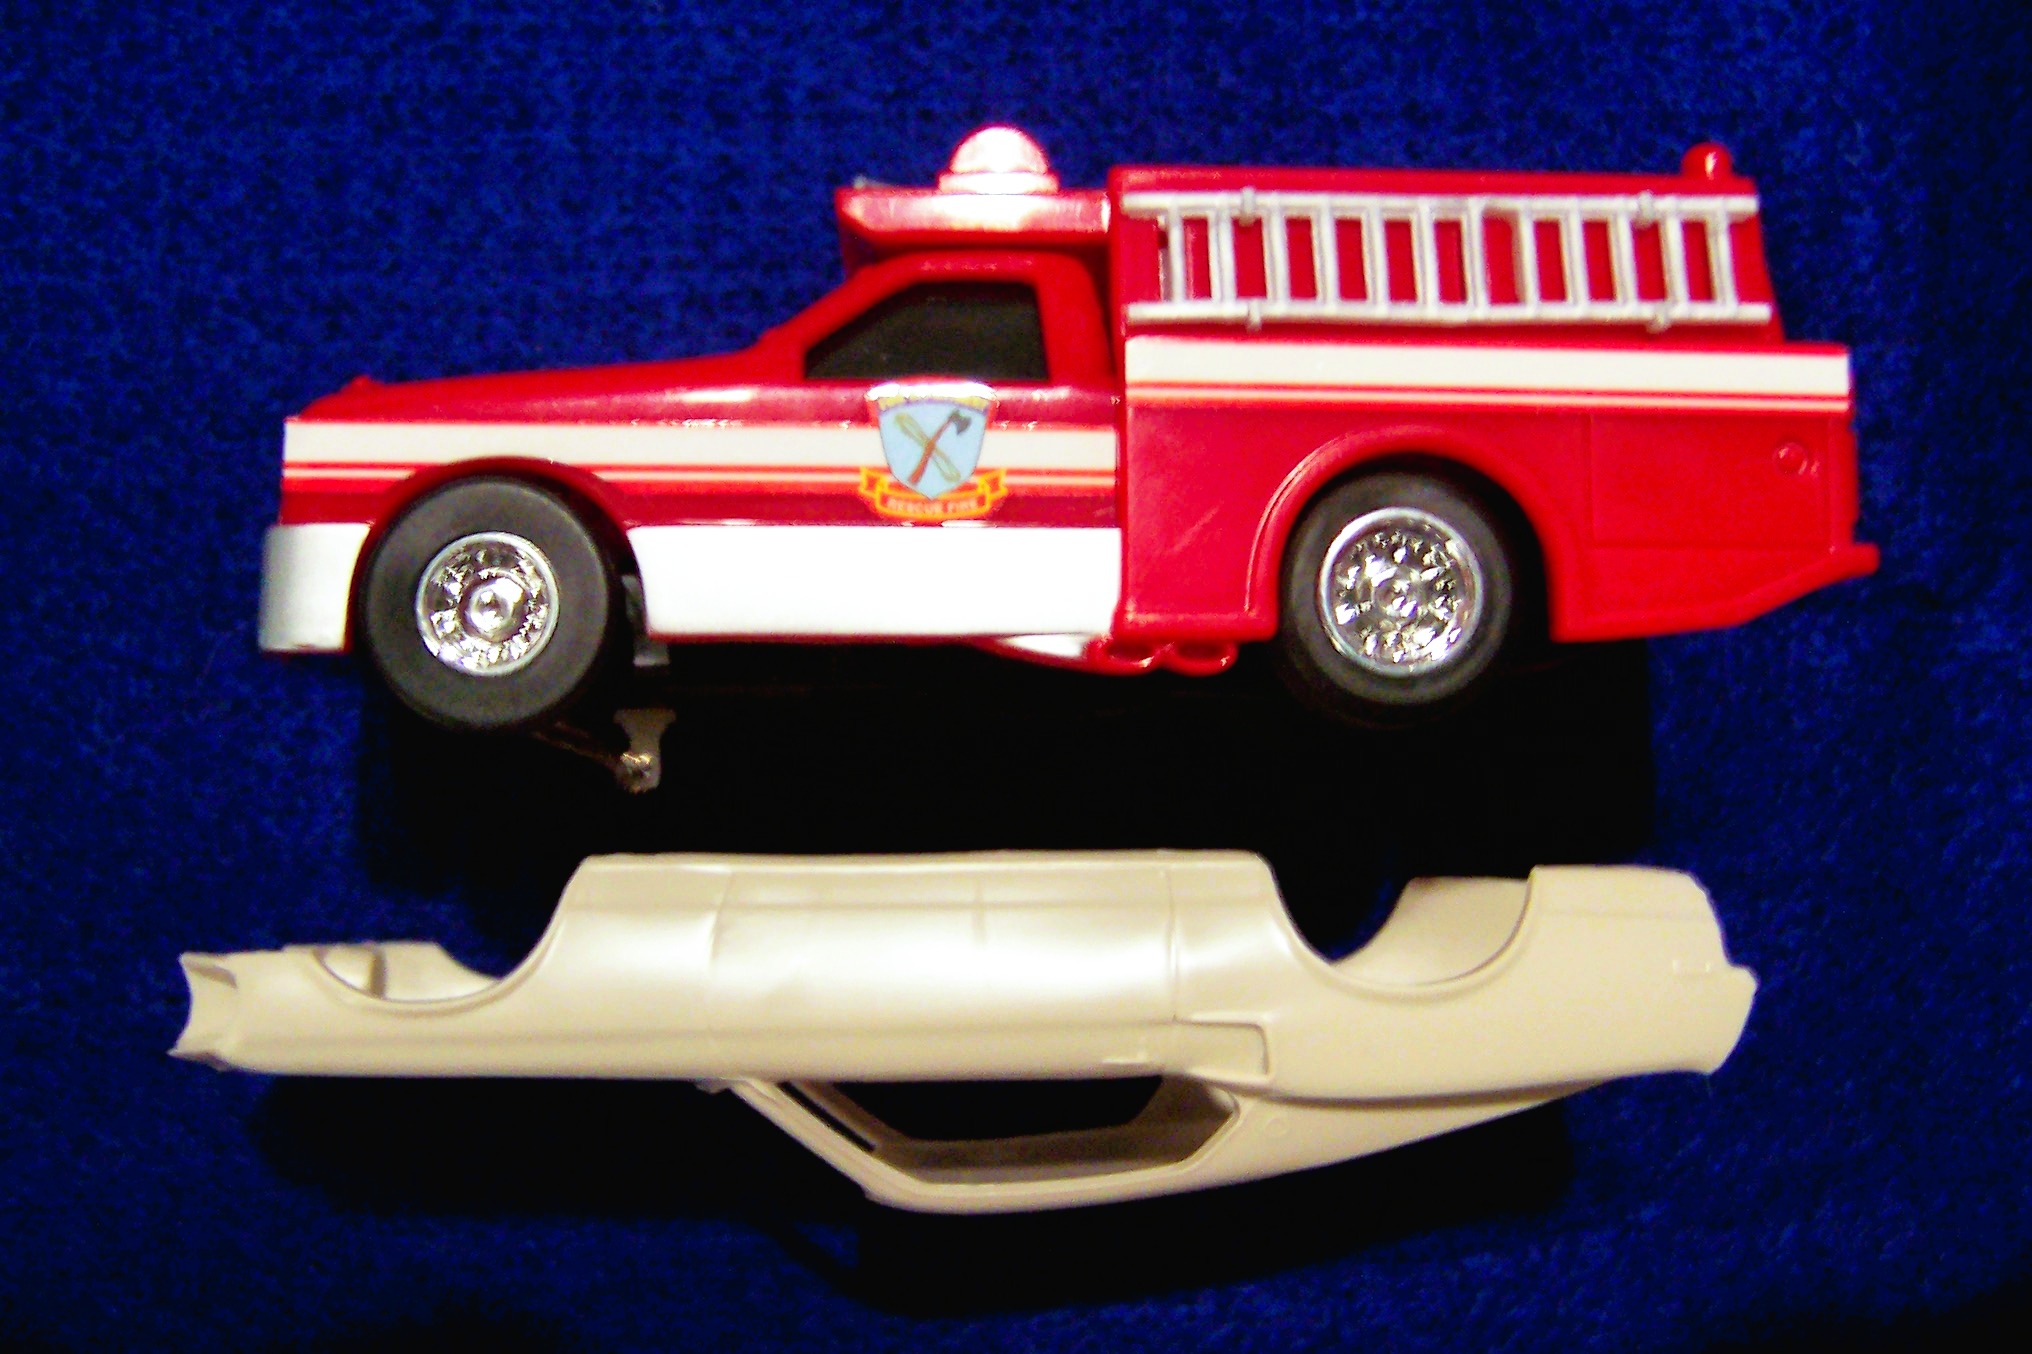
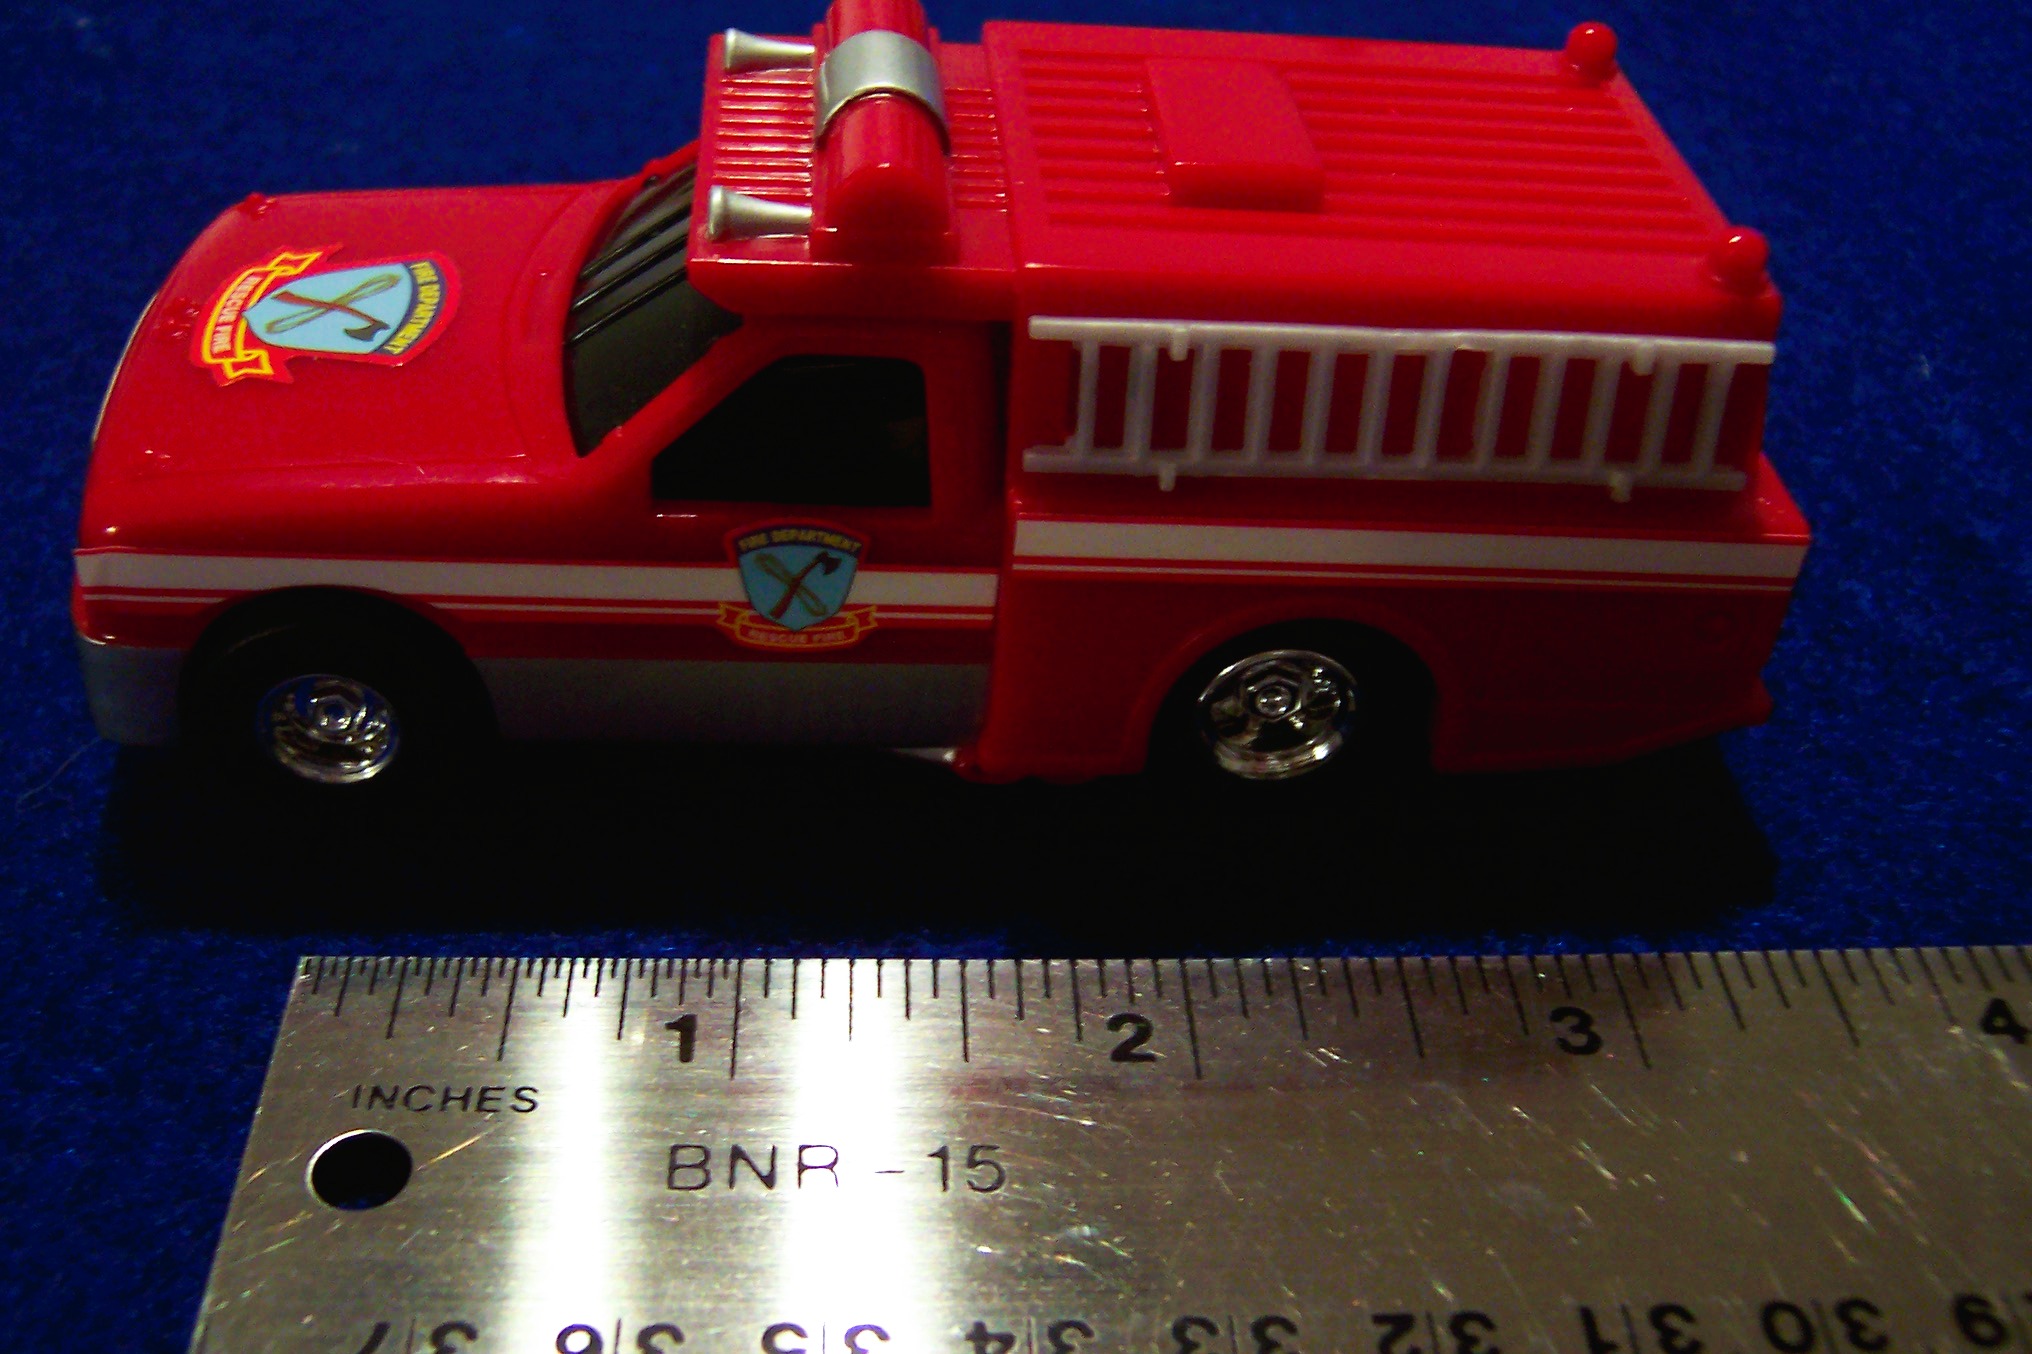
(1) Artin 2003 Fire Truck
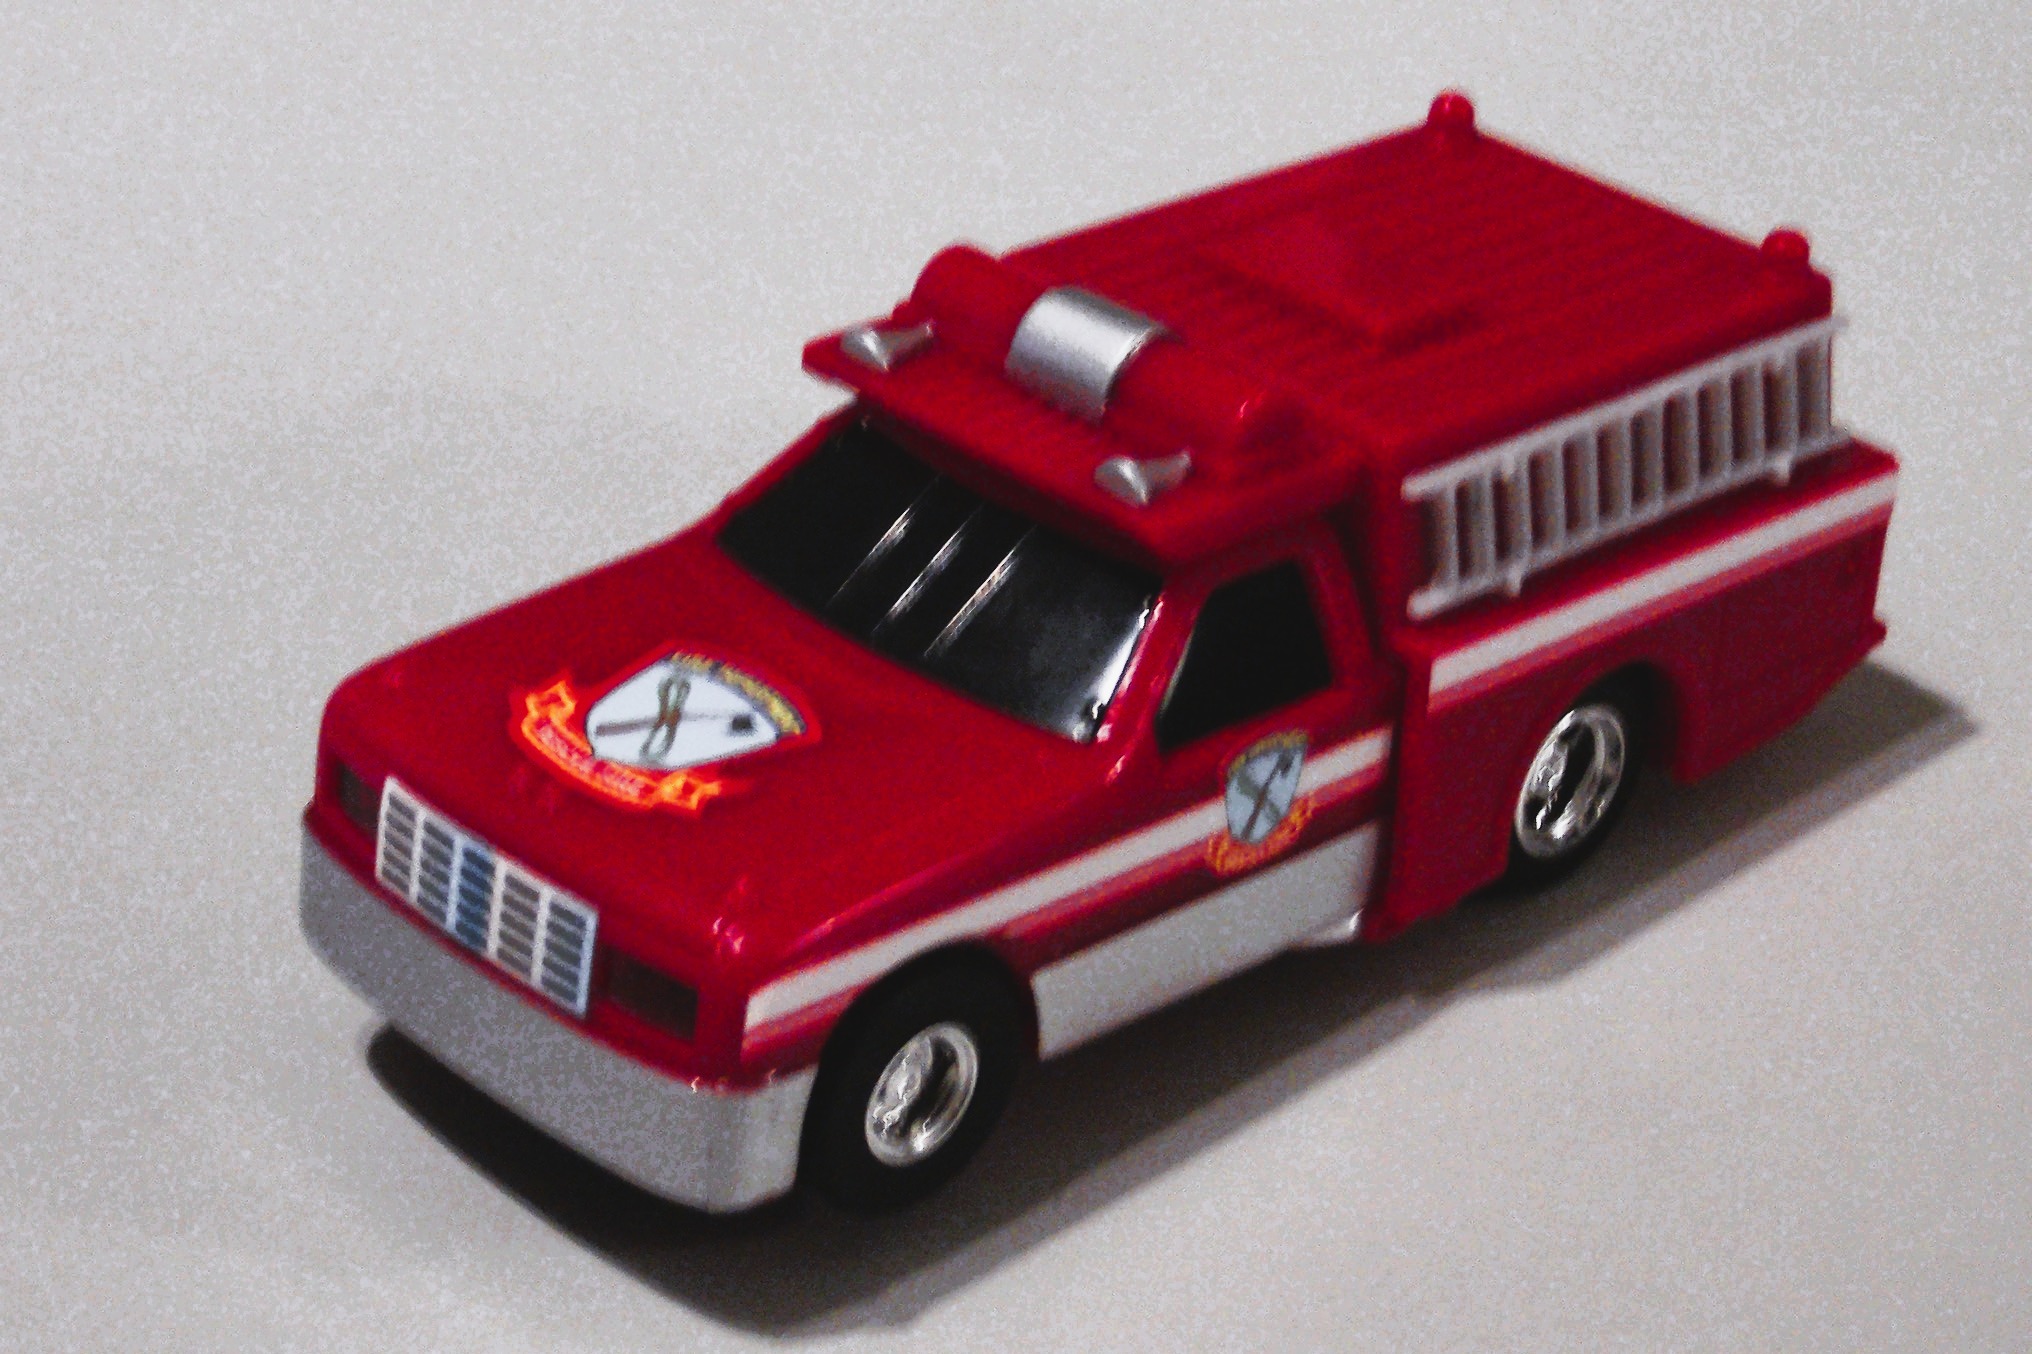
Got this in a basic figure 8 set from Toy’s R Us for $5 at Christmas.
(1) Die-cast Matchbox 1970 Mustang Fastback (Campbell’s Soup)
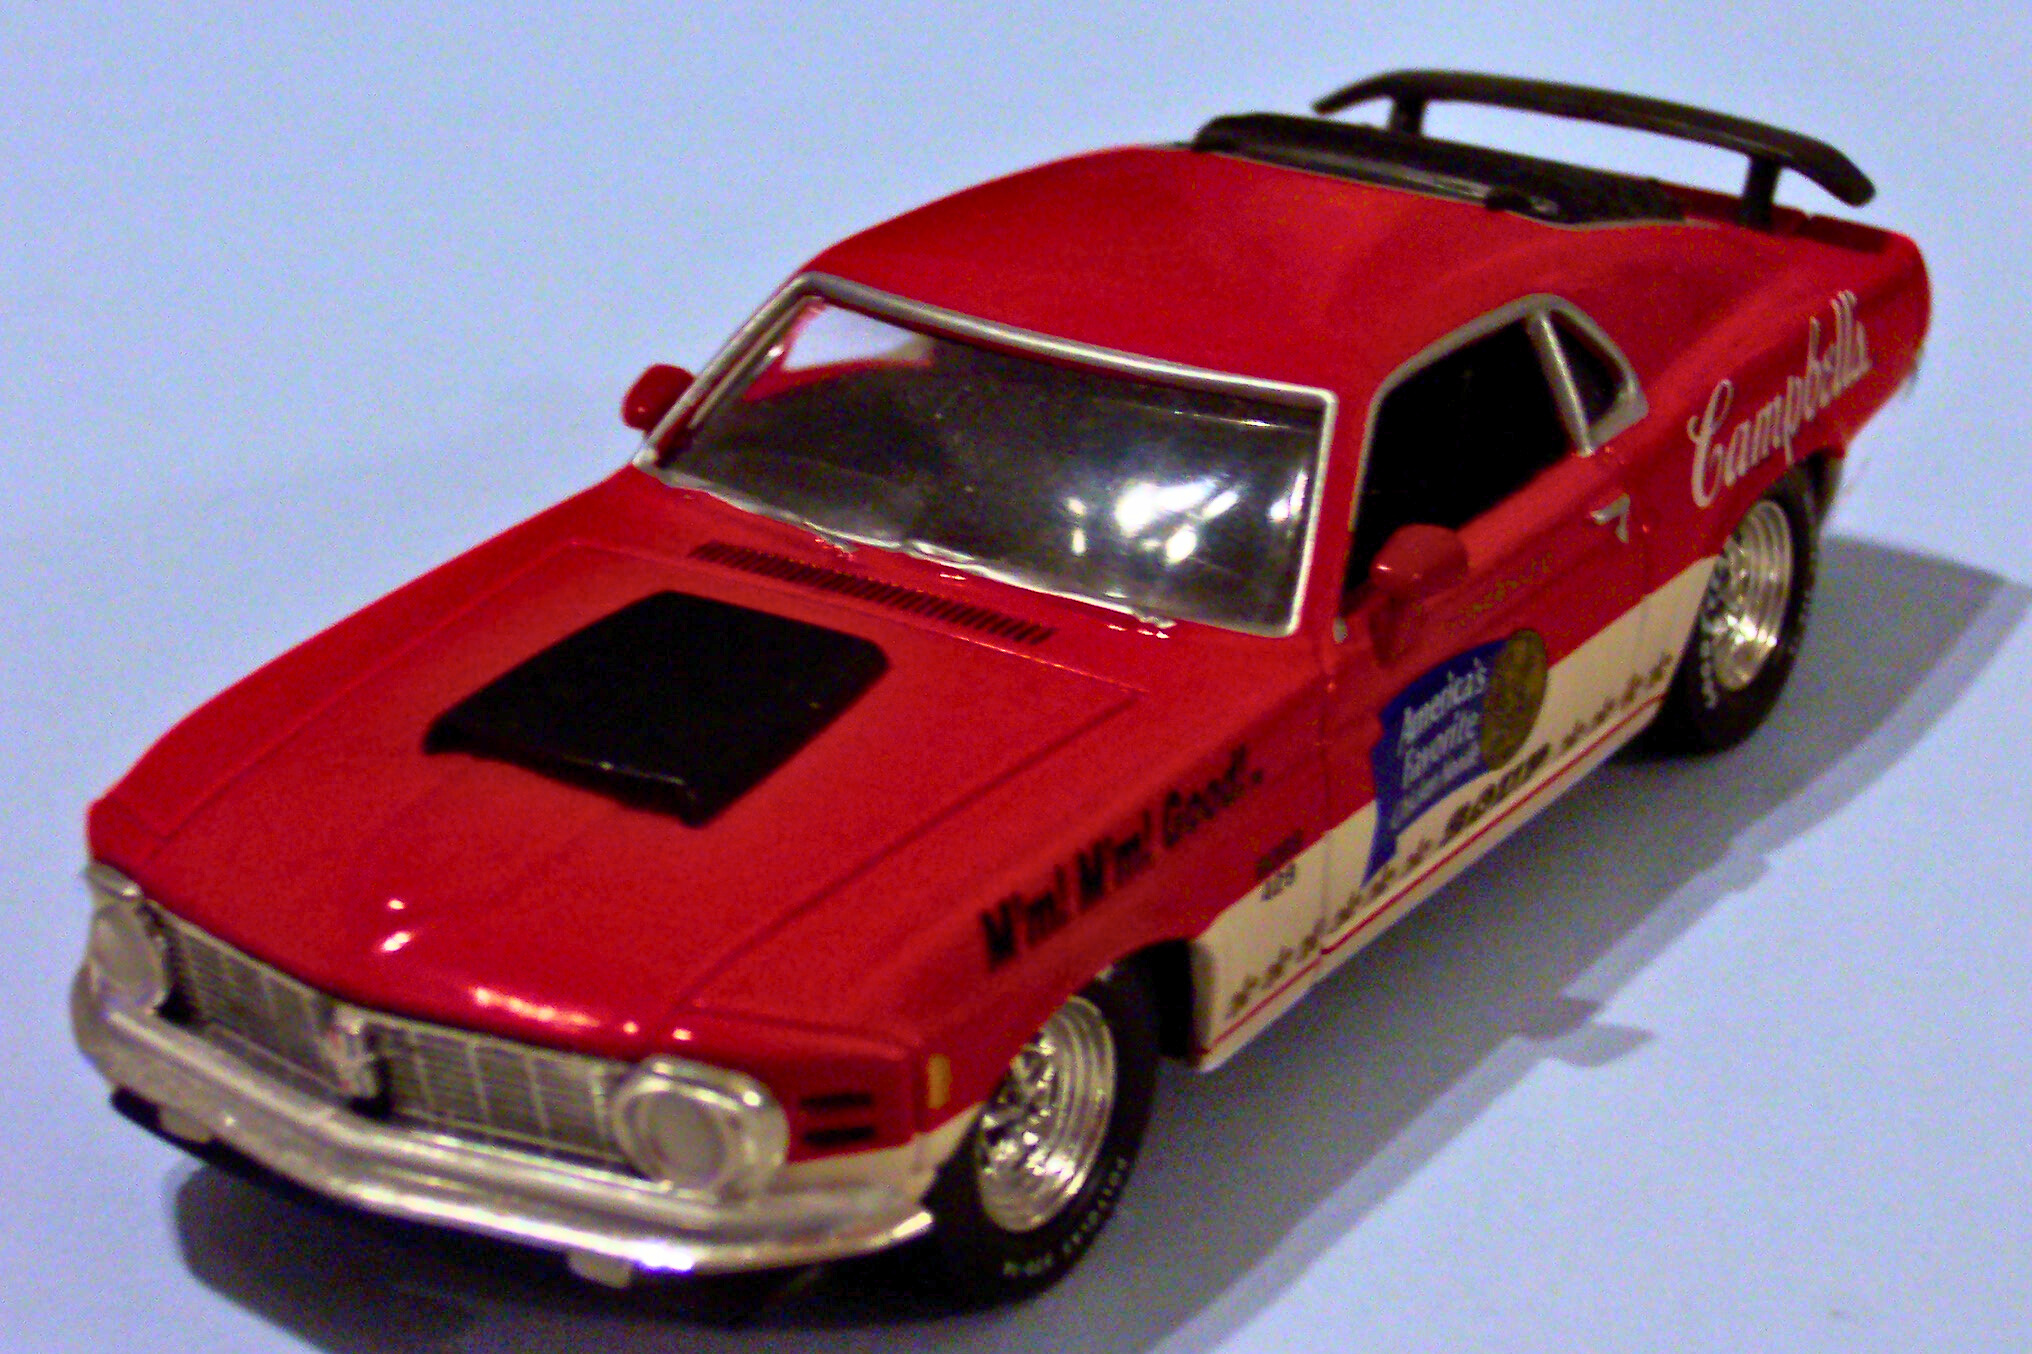
I bought this many years ago from a shop in Monterey, CA. I hated to tear it apart, but I wanted the spoilers, louvers and scoop from it. Wouldn’t you know that I just recently found the same car (without the Campbell Soup markings) at a grocery store.
(1) Old Artin chassis
I don’t know original model was. This came from my Artin “Junk Yard” that started with a big eBay purchase.
(1) RadioShack XMODS Command Logic Lights kit
The lights that saved my sanity (as you will read later)!
The Chassis
Starting out, the biggest problem I faced in converting the AMT kit was the wheelbase. As you can see from these pictures, the kit is a full 1/4″ longer than the standard ARTIN J2 chassis.
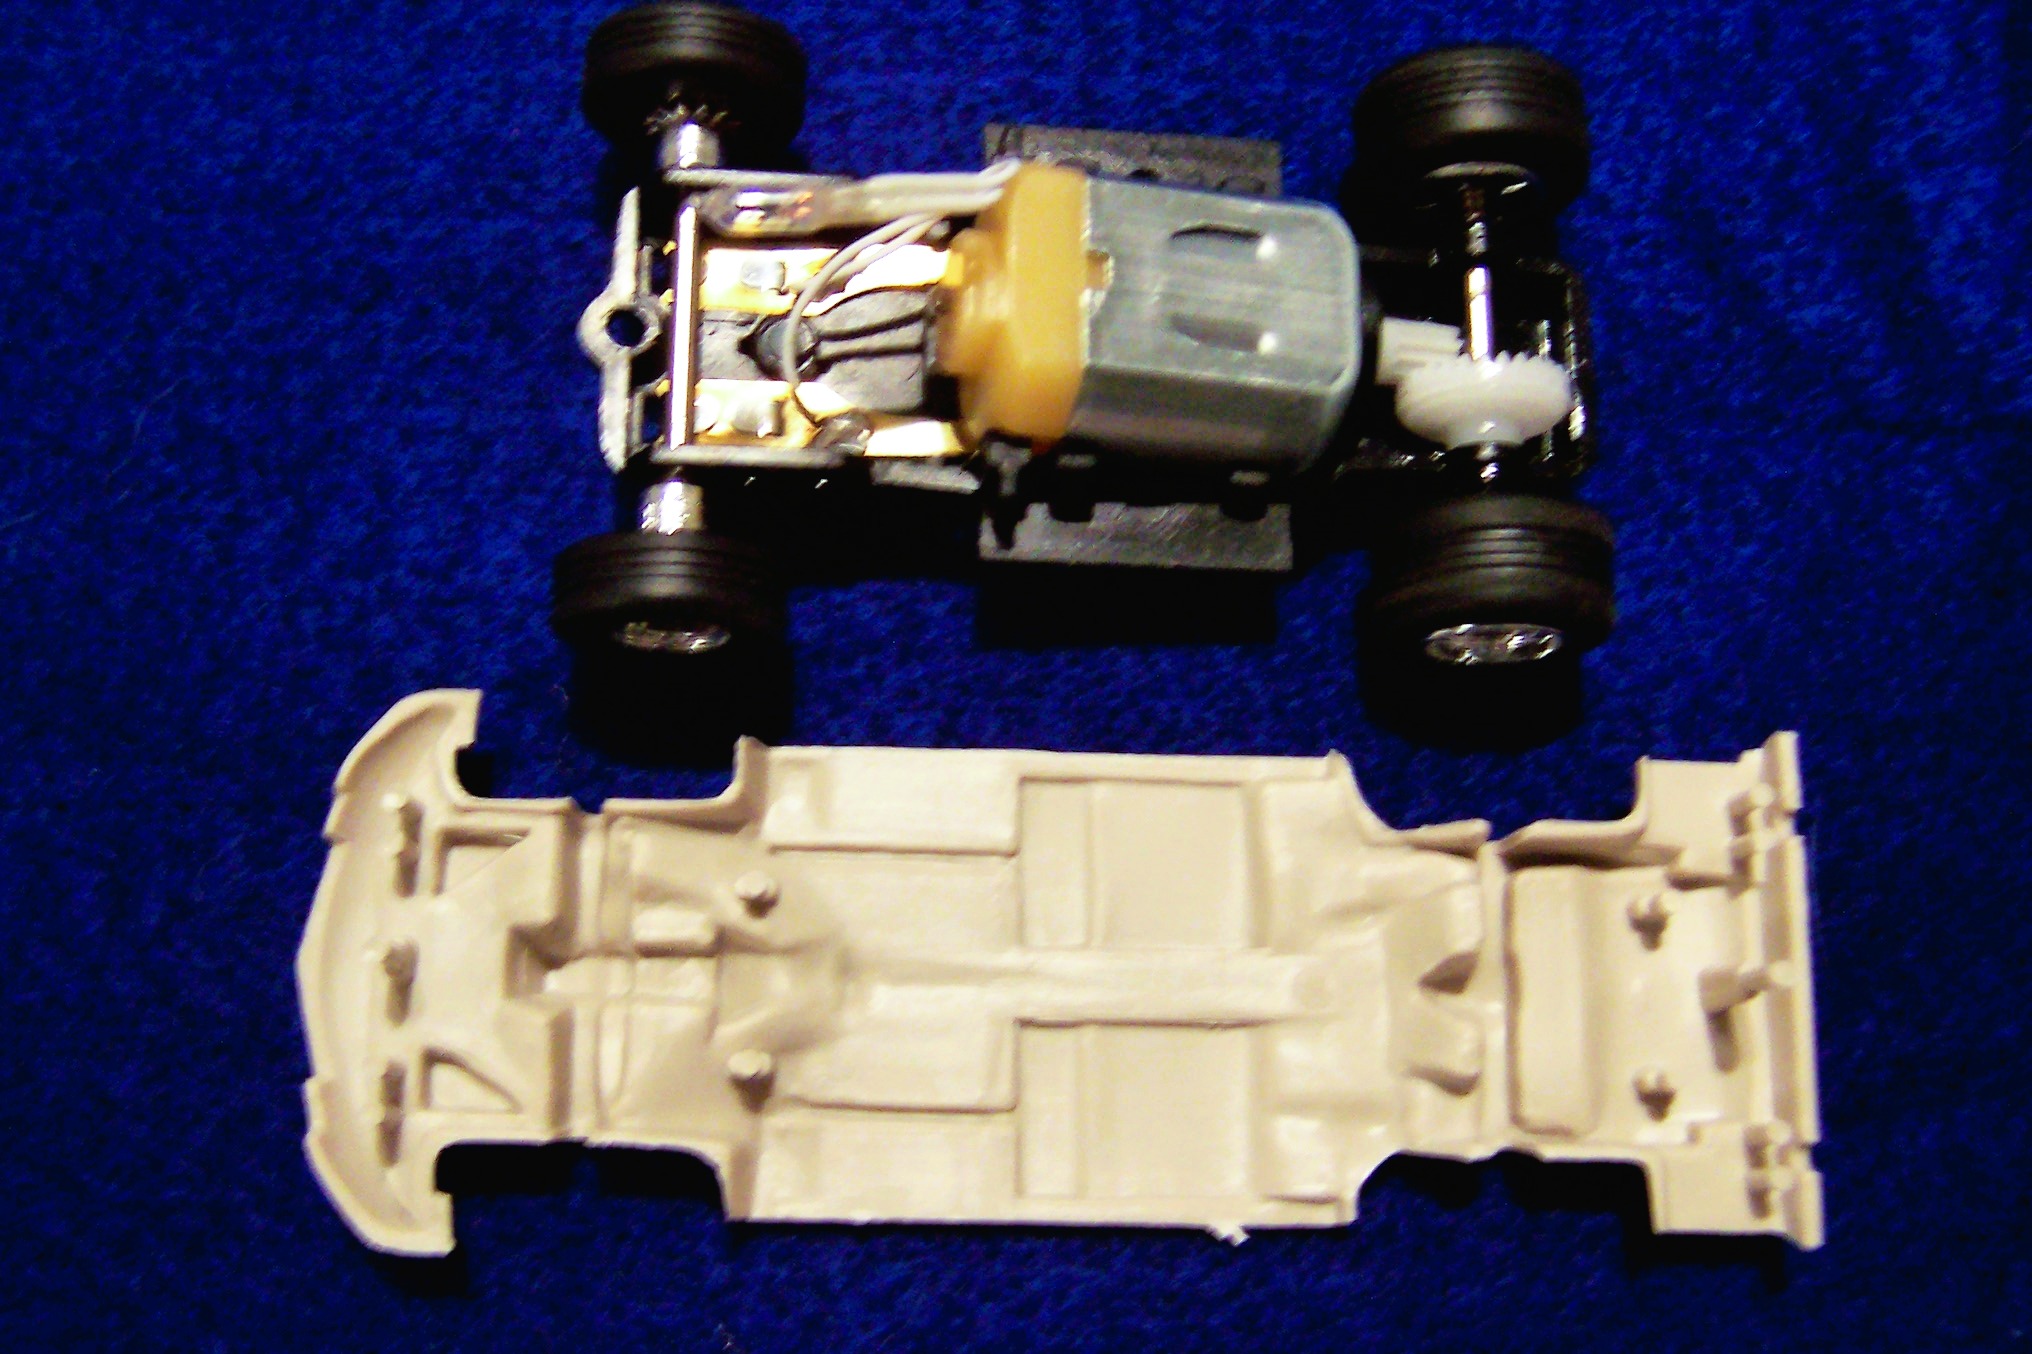
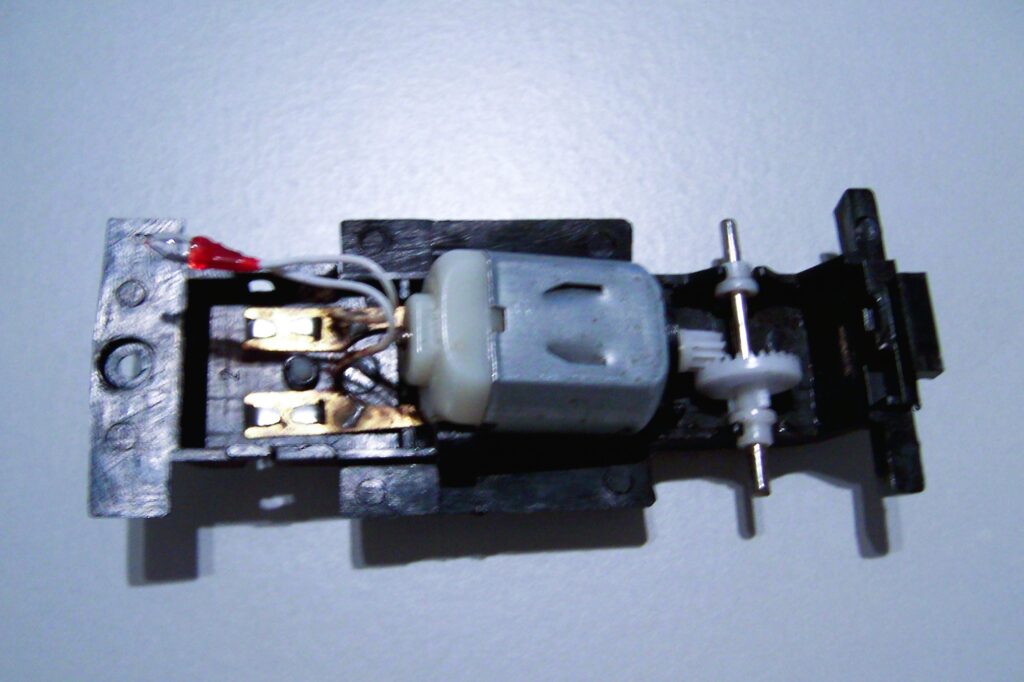
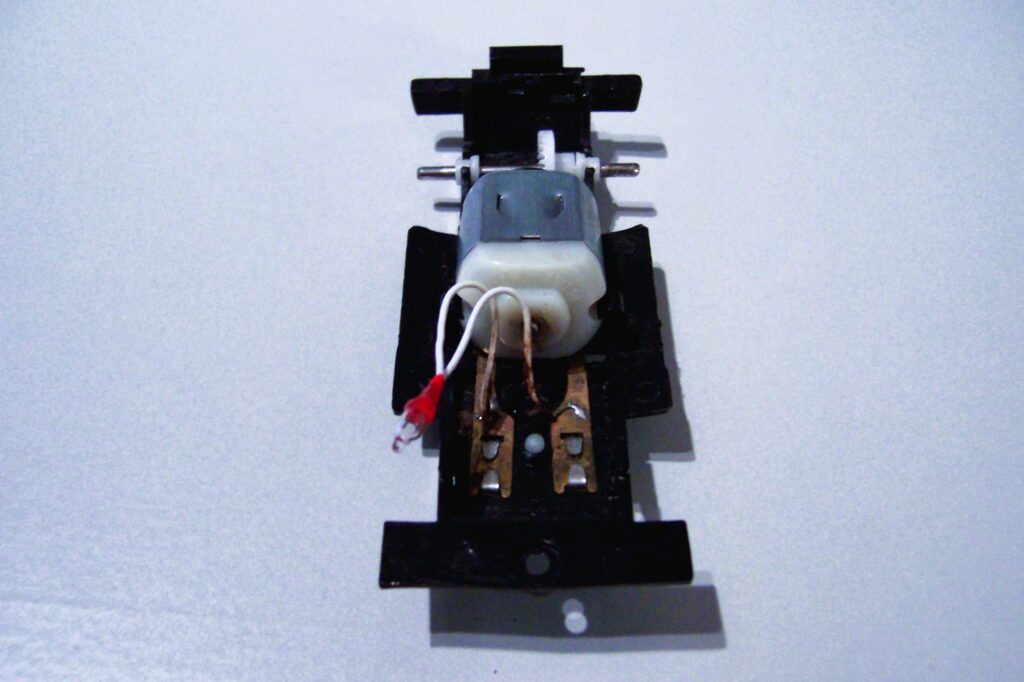
I like the way a J2 chassis runs and had hoped to use the one from the fire truck with out modification. Still, no matter what I tried, I couldn’t get a good fit. I even considered pulling all the components off the Artin frame and mounting them to the models floor, except that I really don’t trust my Dremel work to that degree yet. Finally, I decided to go to the junk yard (an old set of cars I won on eBay) and look for something better. This is what I found…
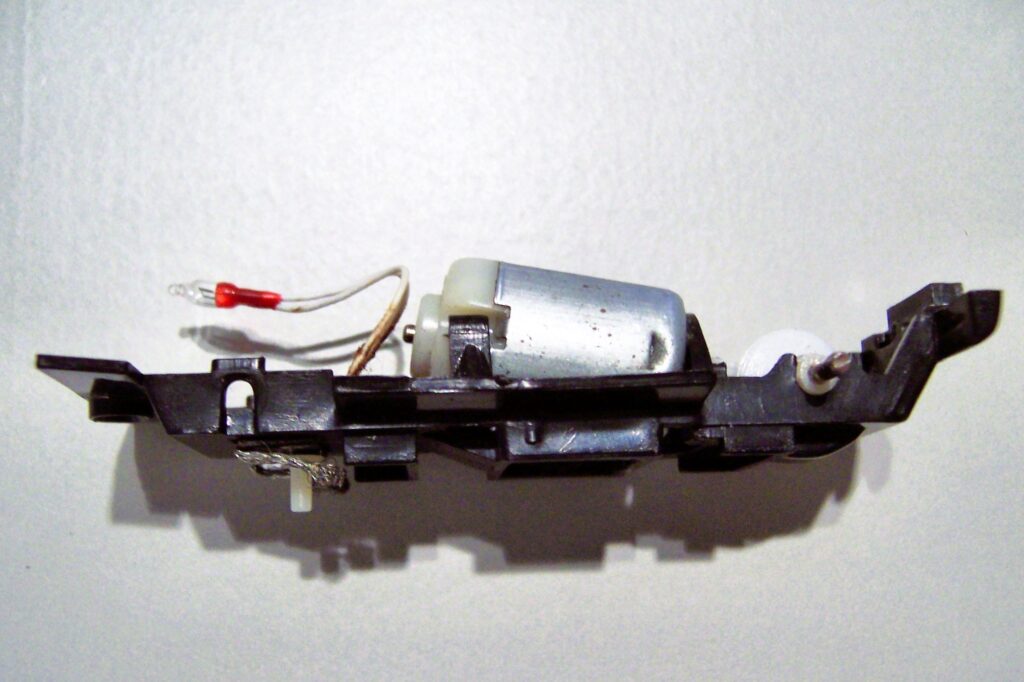
As far as I can tell, Artin made a few chassis that were specific to a certain body. I probably have half a dozen of those. This particular one was missing a body and it is slightly longer, so it made a good candidate. As a bonus, the width was nearly perfect and it has the swept up rear end, which I felt would help when it came to adjusting the rear end height.
By the way, the fire truck did not go to waste. I used it for the wheels, rear tires and pick up brushes.
First Mods
After I had selected the chassis, I was concerned as to how I’d attach it to the body. To get the right wheel clearance in the rear and get the right look, it had be put in at a slight tilt. Originally, I had planned to pull out the entire interior “bucket” to make room for the motor. Since my model didn’t have a full set of window glass (sides were open), I planned to fill in with the interior piece from a SuperSlicks Mustang Convertible….
Unfortunately, once I cut it away to fit over the motor, there was virtually nothing left, and no way to mount it cleanly. Scrap one SuperSlicks!
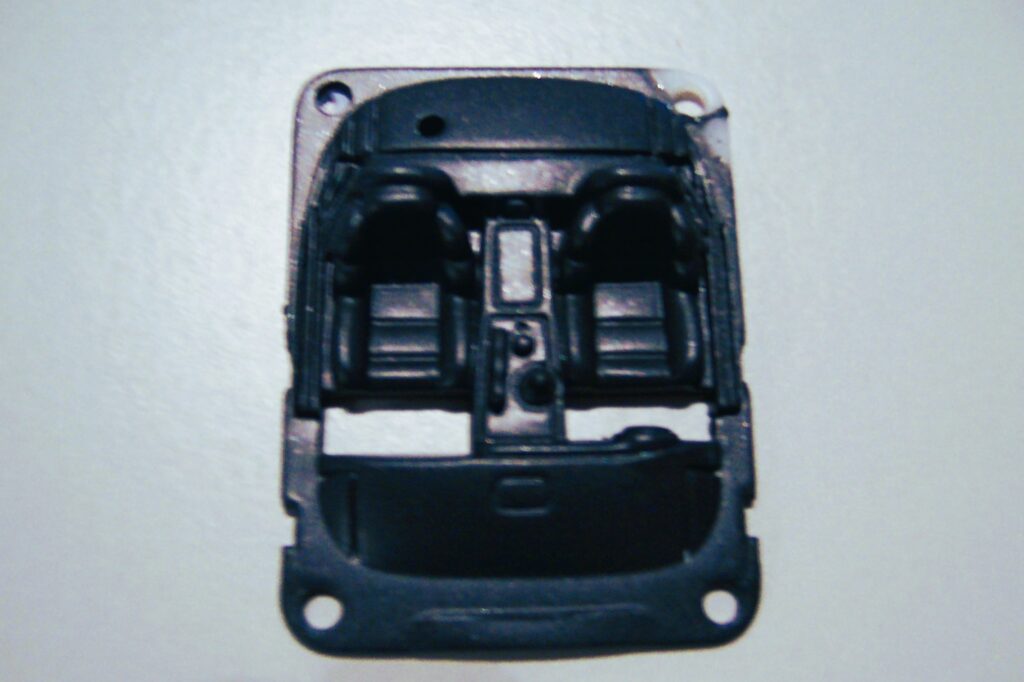
Trying all of this did however give me an idea about the interior that came with the model. I thought that maybe I could cut parts of it away but still leave the tops of the seats in place. I tried it out on a spare interior and it worked way better than I thought. It turns out that with careful Dremel work, I could not only get it to fit, but hug the motor mounts (look carefully at the notches in the third picture). Since the interior only fits one way in the model, I could position the chassis exactly where I wanted it just by adjusting the cuts around the motor. I even used that to get the correct height for the rear end.


After my test work with the spare, I copied the correct cuts over to a fresh interior, cleaned up the edges and painted it black. Now I was ready to work on the body.
Wheels
One of my model kits had the original stock chrome rims that came on the Mach 1. They might have looked best, but because of the way they are designed, I thought I’d have trouble putting Artin tires on them. The tires that came with the model are rubber, but a harder rubber that probably wouldn’t be good for racing. Ultimately, I choose to use the wheels from the fire truck. I kept the standard rubber in the rear, but replaced the front with oversized HO scale rear slicks. It gave me a better muscle car look while still being good for racing.

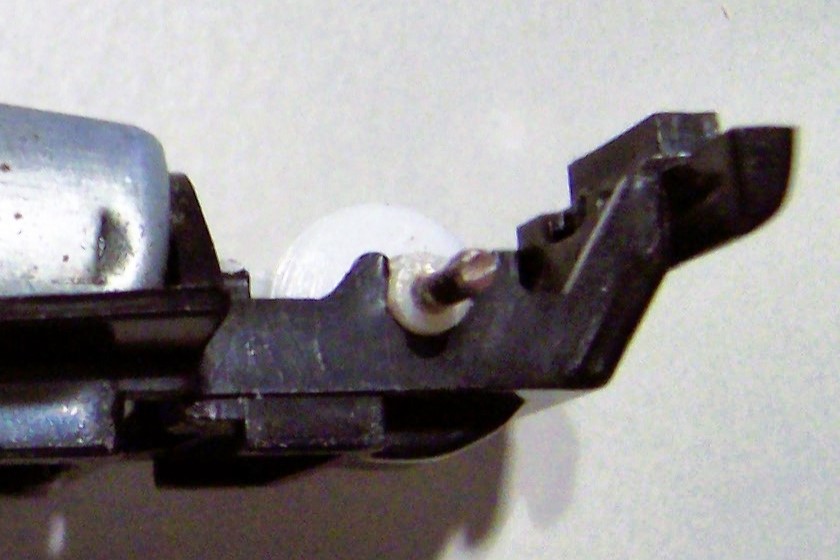
Unfortunately, there was no way that combo would work in the standard axle position in the front of the chassis. I was able to fix it by gluing an aluminum sleeve to the bottom of the chassis to run the axle in as shown in the photo below. This gave me near perfect positioning.

The Body
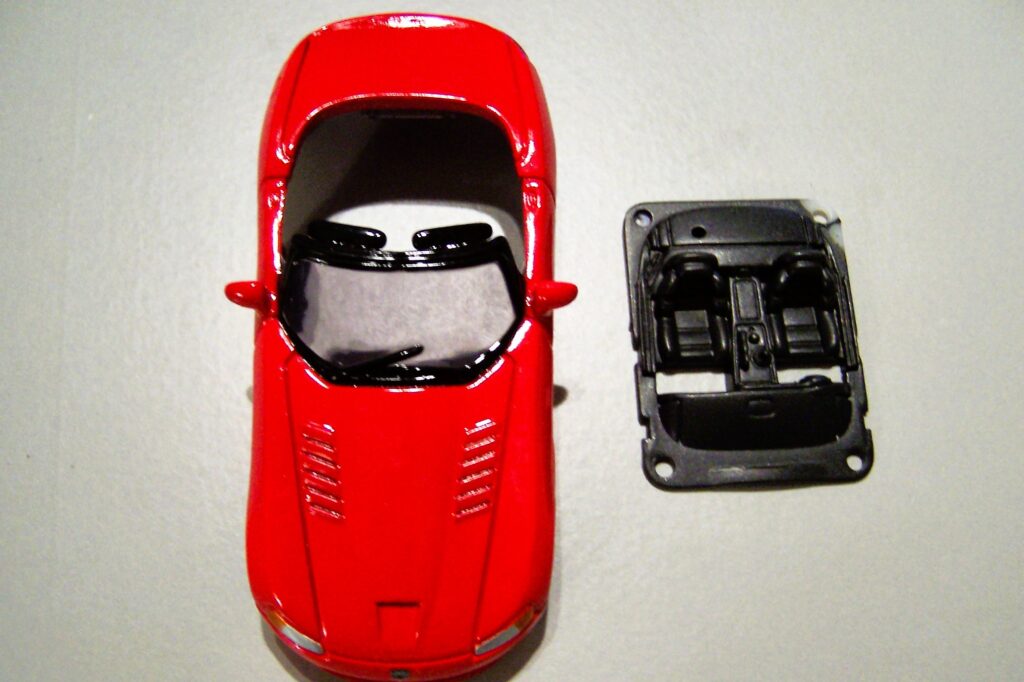
This part was much easier than working the interior. The body required very little modification except for creating mount points for the chassis. As you see below, the model had posts in the front and rear where it snaps together…


I cut a groove in the rear of the chassis to ride one post, and mounted a spare rim from the model in the front to give me something to screw into….
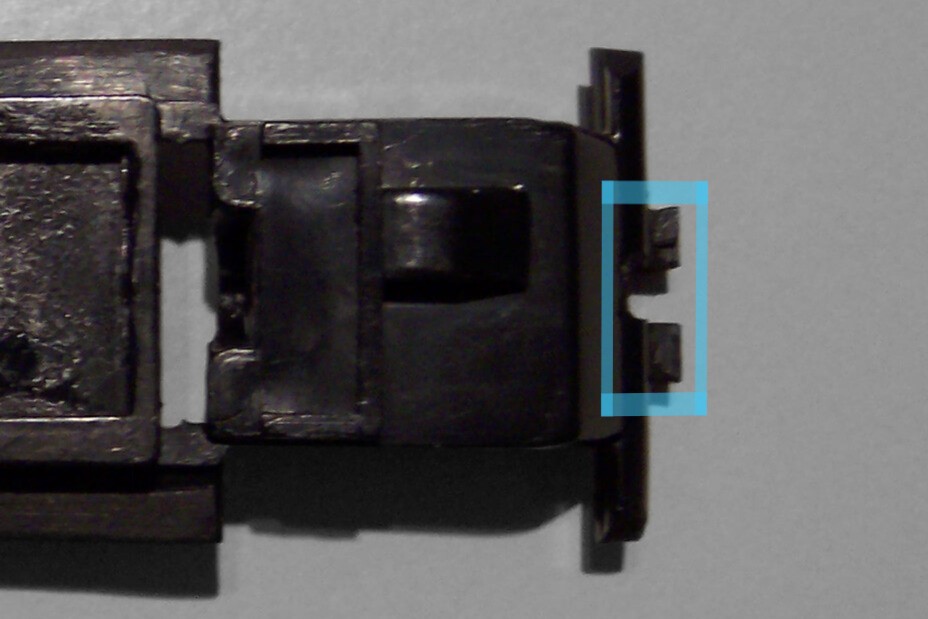

I did spend some time trimming some plastic from the front and rear undersides of the body so that the chassis fit nice and snug, but that was pretty minor work. Once it was done, I glued all of the body parts together, primed it and went to work on the the accessories.
Accessories
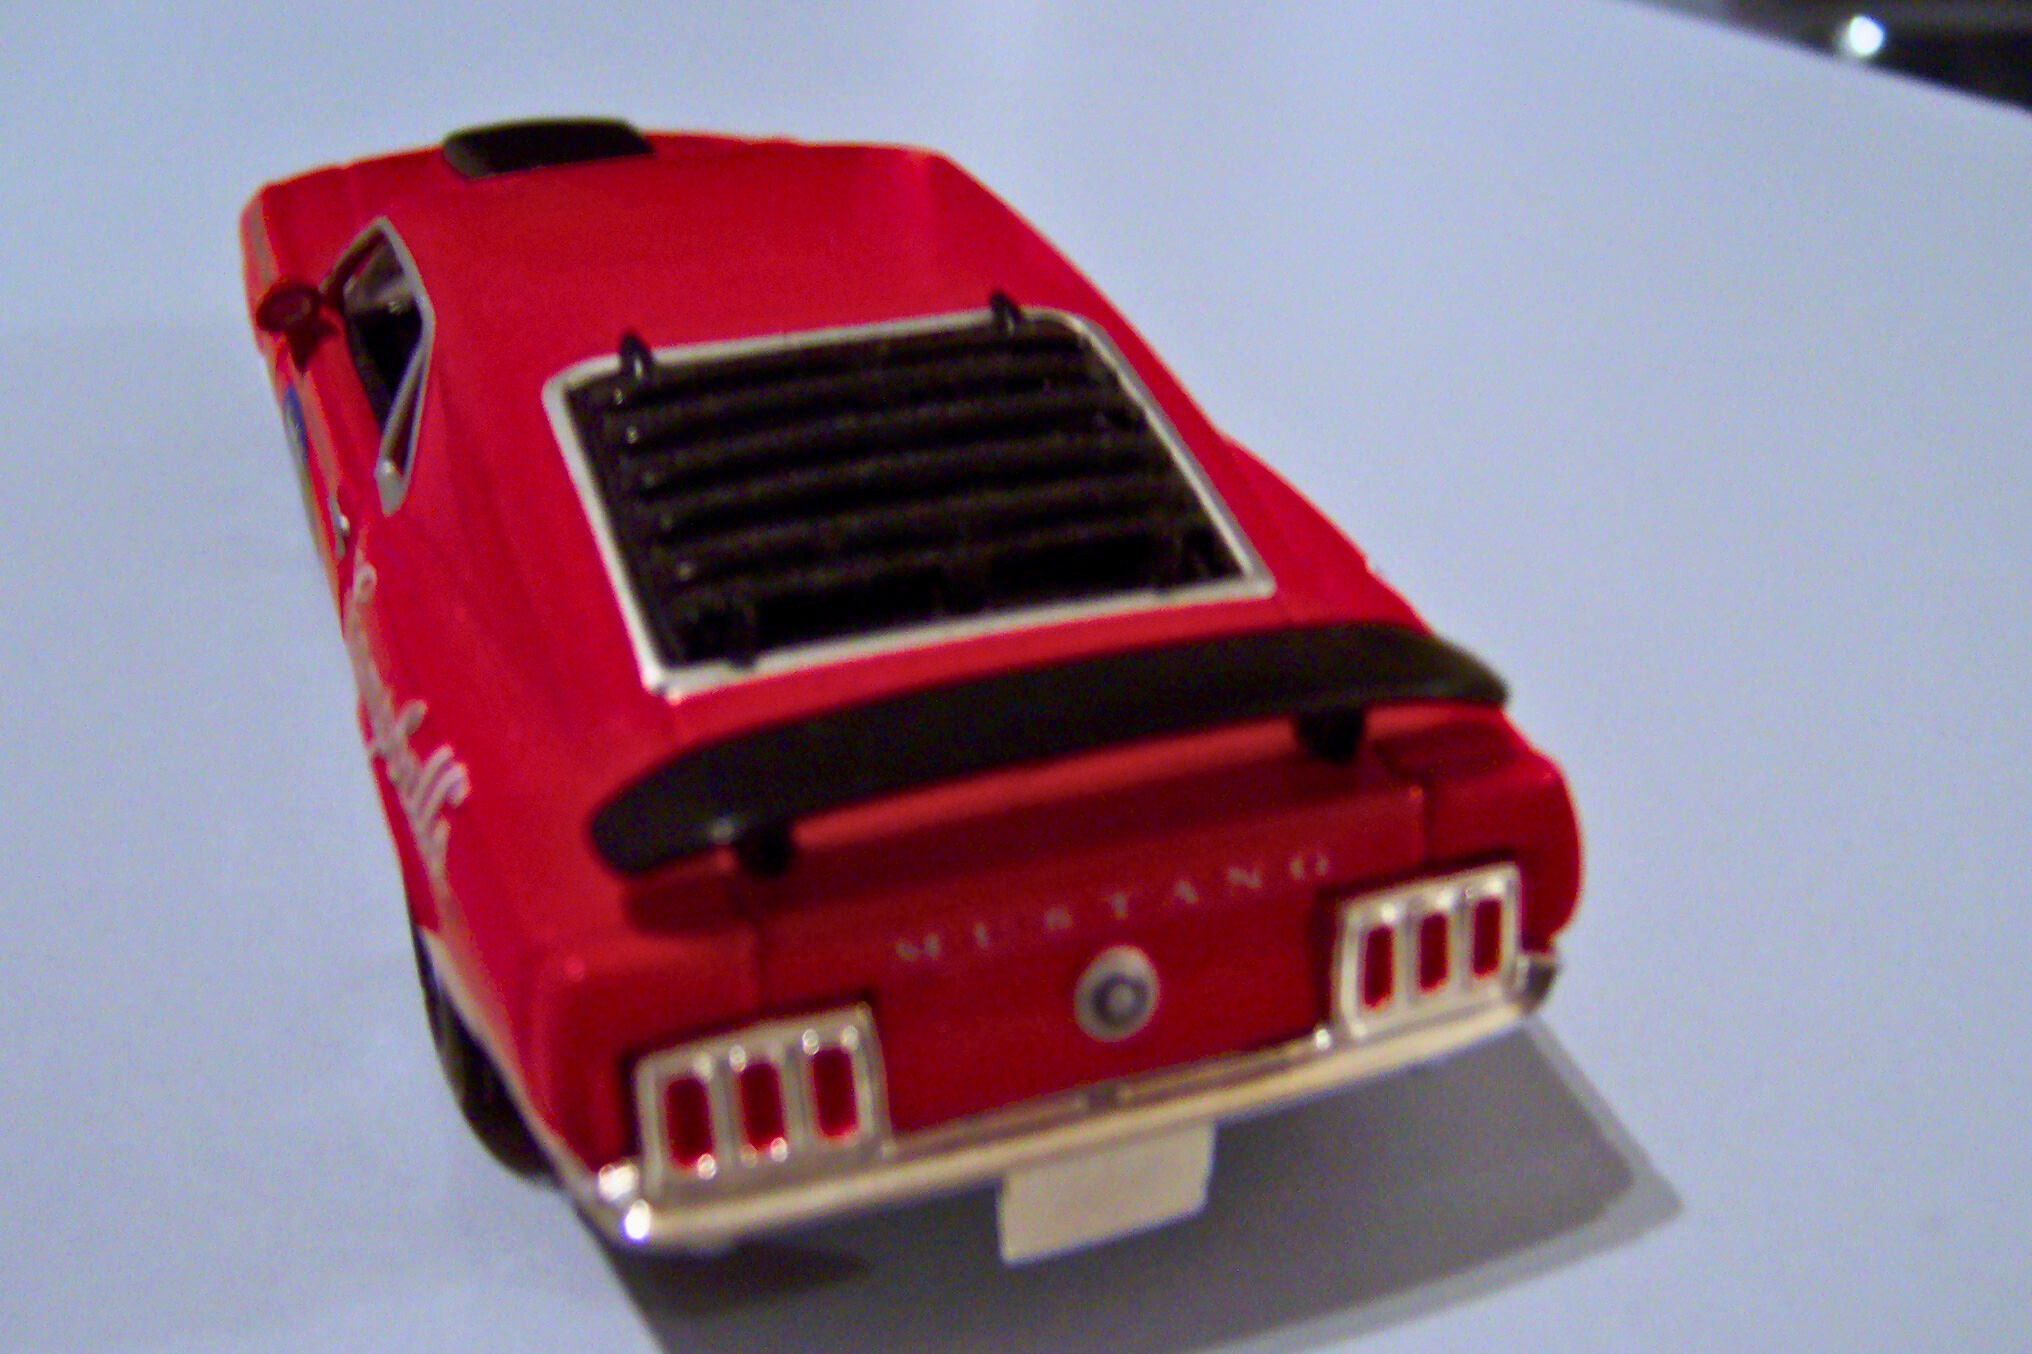
Remember the ’70 Matchbox I mentioned earlier? Time for it to die. I took off both spoilers, the window louvers and the hood scoop. I was careful to leave the original mounting pegs on them so all I need to do drill holes in same places on the model and they should fit perfectly.

Well, they did, mostly. The rear window glass in the model is larger than the Matchbox, so the louvers are actually just a little small, as you can see in this picture….
That however, was not so bad as the hood scoop. The scoop is actually what came on the “Boss” Mustangs. The Mach 1’s scoop was significantly different. Being a purist, I decided it needed modifying. I cut it in half, trimmed out the excess plastic and used the Dremel to put the “points” on the front of the scoop. When it was done, I glued it back together and sanded it down. You can still see the cut line in the early primer shot…


Okay, all the parts are ready – time for paint!
Paint
Here is my first test shot with the car primed…

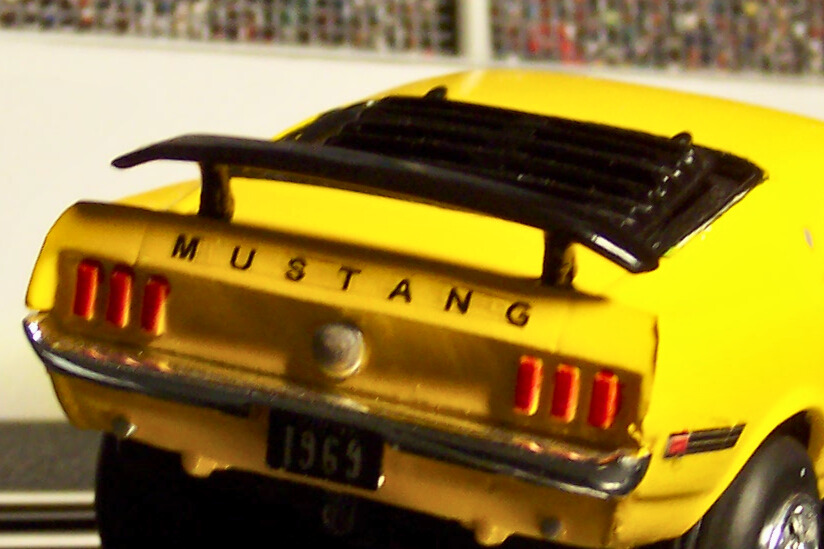
Okay, choosing a color for the car is where I went off track a little. As much as I want to replicate the cars I owned, I never really liked too many of the original Mach 1 colors. I actually liked the white color of the primer and thought (briefly) of painting it gloss white. In the past however, I’ve never had good luck with painting models that color, so it has to be something else. I have quite a collection of die-cast Mustangs and for at least 20 years I’ve known that there is one color that really looks good on them – bright yellow! As a matter of fact, Ford figured that out the next year when they came out with the ’70 Boss. For this project, I used the basic Testors spray paint available in most hobby shops. The color was Gloss Yellow. After a couple of coats, I taped off and painted the hood black. In real life, it is supposed to be a non-glare flat black. For this project, I decided that the whole car had to be clear-coated to protect it, so the hood ended up glossy. The decals were from the original model, but since they are so old, I went through 5 sets of them to get them to look good. The remaining details were hand painted, except for the lettering, which was done using a label maker and a very small font. This is the end result….

At this point, I’m really happy with the car and like the overall look. You will notice that even though there is no side glass, you don’t really see the motor. I managed that by using a flat black interior, a motor with a flat black housing, and tinting the window glass about six shades. Also, in this next picture, note the headlights (more on those later)….

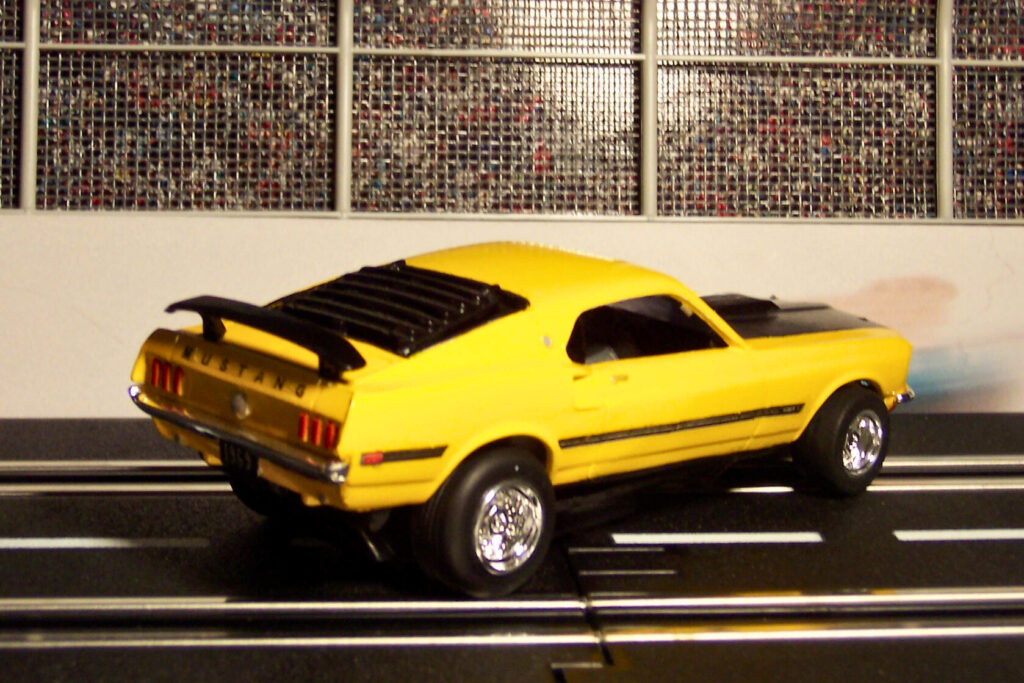
I especially like the way that the rear end is lifted, which is pretty much a standard for old muscle cars. I also really like the paint on the tail lights. I would have loved to have the light up, but decided they were too small to work with….
So, remember I mentioned headlights? Well, read on and welcome to my nightmare!
Lights
So, for the record, let me state that I am really happy with how the headlights turned out. That being said, putting lights in this car was miserable experience. It took more time and effort than the rest of the car put together!
It started simply enough. I drilled holes in the model where the headlights are, and figured that I could mount lights under the fenders. The trick would be finding bulbs that fit, in a voltage that would work. After a few weeks of looking, I finally found some 4mm bulbs with leads at a train shop. Initially, I thought I could use them and that the curvature of the bulb would look like headlight glass. A few problems with that. If you look closely at this picture, you will note that the edge of the hole is almost even with the underside of the fender. That caused the bulbs to be too far off center, and worse, meant that I would have to glue the bulb to fender to keep it from showing in the fender well.

Okay, so now I needed a smaller bulb. I wanted to find them in the local area in case they didn’t fit or I need more. No such luck. I also considered LED’s, but not even our local Frye’s caries something that small in white. They do however carry replacement bulbs for the Mini Maglite flashlights!
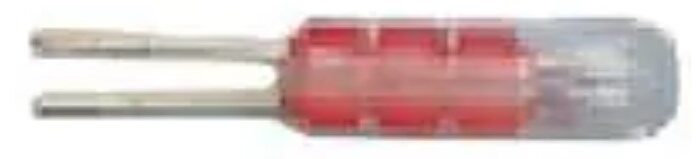
These bulbs are 2.5mm in diameter, which fit MUCH better. At 3 volts each, I figured I could run them in series and not burn them out, even at full throttle. Unfortunately, they were designed for sockets, which meant that I would have to solder leads to the prongs, and insulate at least one lead to prevent shorting. At 1mm separation, not much room to work with. It took me five attempts to complete my first bulb!
It turns out that soldering the leads to the bulb weakened the glass. Any time I tried to bend a prong to keep it away from the other one as I was soldering, the bulb would break!
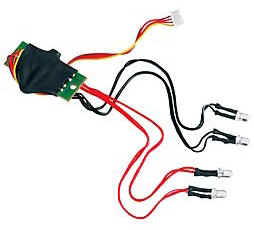
It was just after I complete one side of the pair (and broke the other) that I stumbled across my final solution. I was in RadioShack checking the RC cars when I noticed a light kit for the X-Mods. It had small white and red LED’s with plenty of lead wire attached, and they were 6 volt. Bingo!
Okay, now that I had bulbs, I had to figure out how to mount them. I could glue them in place, but that would be a pain, especially if I want to separate the body and chassis. Fortunately, all my solder work had shown me that you can do some really cool things with heat shrink tubing. Once you heat it, it becomes kind of stiff. Better yet, by placing it on some aluminum tubing first, I was able to shrink it to the perfect size to hold the bulbs. Once it cooled, I cut it to length and glued it in place.
Next came the wire connections. Once again, I wanted avoid a permanent connection so that I could remove the body. I also needed to run the wire back past the front axle. I finally decided to drill small holes in the passenger compartment and run through there. It was at this point that I had a brainstorm. I decided to use an extra pair of pickup brushes to to close the circuit between the lights and motor feeds. By bringing them out of the “firewall” in the passenger compartment, they lined up perfectly with the motor feeds. Now I could remove the body at any time without worrying about the lights!
Conclusions
Working in my spare time, this project took me nearly three months to complete. Almost all of that time was spent in engineering solutions to each problem as I encountered it. I was fortunate in that I had a large stock of 1:43 scale cars and parts to work with, as well as three sets of the Mustang model kit. In a worse case scenario, I knew I could always start over from scratch.
I am also glad that my first kit bash was in 1:43 scale. I know that people have done similar projects in HO scale, but they must have the hands and eyes of a top level surgeon! I also got really lucky to even find a model kit of my all time favorite car in that scale. I guess some things are just meant to be.
Oh, and that Artin contest? I took 2nd place. I don’t quite remember for sure, but I think the winner did a custom track build. I do remember that he deserved the win and wish I could find some pictures of it, but that was the early days of the Internet and not everything was kept forever.